Acme United
P-72 15-inch Ruler with Protractor
P-72 15-inch Ruler with Protractor
Couldn't load pickup availability
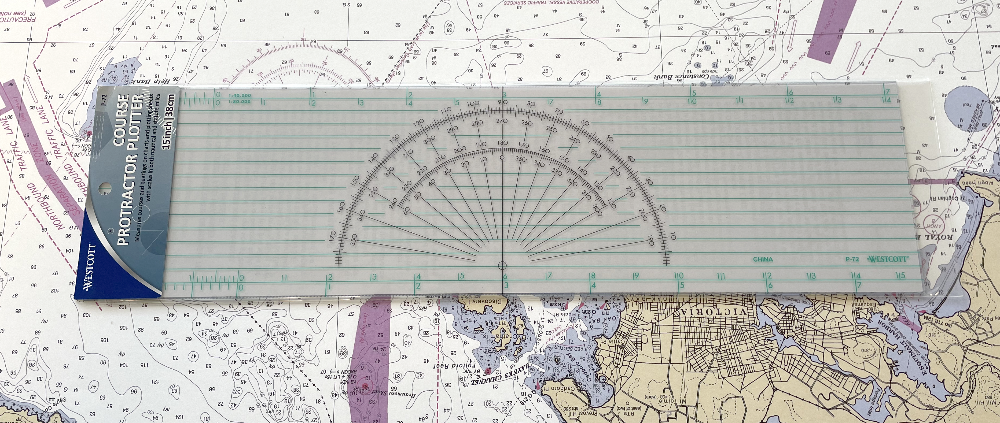
Transparent plastic course protractor plotter is designed to measure courses and bearings on charts and plotting sheets. Use for drawing a course or bearing from a given point, moving a line parallel to itself or plotting celestial lines of position. It has scales 1:40,000 and 1:80,000 in both nautical and statute miles.
1. FOR MEASURING COURSES AND BEARINGS Place either of the long edges, or any one of the parallel lines, along the course of bearing to be measured. Slide the plotter along this line until the central point (or bull's eye) of the protractor is over a meridian. The course or bearing is read on the protractor scale where it intersects the meridian. Read courses and bearings in the N.E. and S.E. quadrants on the outer scale. Read courses and bearings in the S.W. and N.W. quadrants on the (inner) protractor scale.
2. TO USE THE AUXILIARY PROTRACTOR SCALE Whenever the course or bearing to be measured is nearly North or South, and it is difficult to slide the plotter's bull's eye to a meridian, the auxiliary protractor scale should be used. Instead of using the vertical meridians of longitude as the reference lines, the auxiliary protractor scale uses the horizontal parallels of latitude. Slide the plotter's bull's eye to a parallel and read the direction from the proper auxiliary protractor scale. Note: The auxiliary protractor scale should be used in any use of the plotter where a course or bearing (azimuth) is nearly North or South.
3. TO DRAW A COURSE OR BEARING FROM GIVEN POINT Place the point of your pencil on the given point and slide the plotter until one of the long edges is touching the point and the bull's eye is over a meridian. Then while keeping (1) the plotter against your pencil and (2) the bull's eye over the meridian, slide the plotter until (3) the desired course or bearing is read on the protractor scale where it intersects the meridian. When all three of these requirements have been met, draw the desired courses or bearing line along the edge of the plotter.
4. TO MOVE A LINE PARALLEL TO ITSELF When, as in advancing a line of position, it is required to move a line parallel to itself, the parallel lines on the plotter are used. Determine the distance the line is to be moved and place the point of your pencil at that distance. Slide the plotter to the pencil and align it with the original line of position, using the parallel lines as guides. If it should be necessary to advance a line more than the width of the plotter, an additional line may be plotted parallel to the first and the line moved in two steps.
5. TO PLOT CELESTIAL LINES OF POSITION Plot the azimuth line as a bearing by placing the pencil point on the AP or DR position and slide the plotter until the bull's eye and the azimuth angle (Zn) are on the same meridian. Draw the azimuth line toward the body. If the intercept is "away," extend the azimuth line far enough away from the body to plot the intercept. After the intercept has been plotted, place the pencil point on this plot and slide the plotter against the pencil so that the center vertical, (90°) line coincides with the azimuth line. Draw the line of position.
6. TO EXTEND A COURSE LINE When it is desired to extend a course line beyond the end of the plotter, spread your dividers three or four inches and place both points of the course line against the edge of the plotter. The plotter can then be moved easily, using the divider points as guides, lengthening the course line the desired amount.
CAUTION: For accurate plotting, all distances should be taken with dividers from the Latitude scale at the side of the chart that you are using. Scales on this instrument are for convenient, quick reference for use with large scale charts or plotting sheets.
Share

